DiscoVista 可视化系统发育不一致
关于系统发育不一致
基因树不一致是一个常见的问题,导致这个问题的原因有很多,如上一篇文章中提到过的谱系不完全分选和渐渗,此外也可能是因为:
- 水平基因转移(Horizontal Gene Transfer)。
- 基因遗传方式的差异(核基因和线粒体基因)。
有时我们会想要找出物种树和基因树间的不一致在哪以及有多严重,因此我们需要一个可以可视化并且能够提供良好解释性的工具。
所以这篇文章将介绍 DiscoVista(Discordance Visualization Tool),它可以帮助我们可视化特定类群在不同树间的拓扑不一致情况。
DiscoVista 的安装和使用
DiscoVista github:https://github.com/esayyari/DiscoVista/tree/master
详细的示例教程:https://github.com/esayyari/DiscoVista/tree/master/example
前排提示,该文所使用的 DiscoVista 经过了博主本人的一些修改以方便使用,如果想要使用和作者一样的版本请更改安装步骤为:
1 | git clone https://github.com/JuseTiZ/DiscoVista.git |
安装
DiscoVista 有两种安装方法,一种是通过 Docker 直接拉取镜像,另一种是通过配置依赖项及下载源码(更困难一些)。
如果已经安装了 Docker 可以通过以下命令使用:
1 | docker pull esayyari/discovista |
如果未安装的话这里提供一种相对于其 GitHub 指导而言更好的方式:
由于 DiscoVista 要求较多依赖项,且其源码编写是基于 Python2 进行的,因此为了避免和别的环境产生冲突,建议新建一个环境进行相关配置。
首先新建一个名为 DiscoVista.yml 的文件,在里面写入以下内容:
1 | name: DiscoVista |
此后运行(如果没有 mamba 的话可以尝试 conda,但成功率会比较低):
1 | mamba env create -f DiscoVista.yml |
环境安装成功后,DiscoVista 所需要的各项依赖项就已经配置完成,此后通过以下命令下载源码并激活环境:
1 | git clone https://github.com/esayyari/DiscoVista.git |
现在你应该可以通过 $WS_HOME/DiscoVista/src/utils/discoVista.py 进行调用:
1 | $WS_HOME/DiscoVista/src/utils/discoVista.py |
如果下载的是原作者的 master 分支,那么进行以上安装后还需进行如下修改:
打开 DiscoVista/src/R,修改其中的 main_depict_clades.R,在 read.data 函数下该部分添加 as.is=F:
1 | ... |
as.is 为 TRUE 时,R 不会将读取数据中的字符串转换成因子,因此部分函数会返回 NULL 导致画图异常,修改后就可以正常生成 pdf 和 csv 结果文件。
该选项在 Rv4.0 前默认为 FALSE,而在此之后的 R 则需要手动指定。
该问题我已向 DiscoVista 提交 PR,如果后续被接受则可跳过该修改部分,也可以在配置环境时指定更低的 R 版本避免该问题(但我没有尝试过)。
DiscoVista 的示例数据集比较复杂,为简化理解,我从 NCBI 上下载了来自于 人 鸡 小鼠 黑猩猩 非洲爪蟾 斑马鱼 六种物种的蛋白序列并随机挑选其中五十个直系同源基因进行展示。
运行
对示例数据集进行了以下操作:
- Mafft & TrimAl 比对修剪。
- 使用 IQTREE 对每个基因进行了最大似然建树。
- 使用 IQTREE 对串联序列进行了分区建树。
- 使用 Astral 基于基因树推导了物种树。
- 为了对比效果人为编写了一个物种树。
本文中所使用的示例数据集仅为更好地呈现 DiscoVista,因此并不具备绝对的严谨性。
需要提前注意的一些地方:
- 有些树的支持率为后验概率等,其最大值为 1(与自展值不同),对这种树需要进行一定处理(后记中有相关脚本)或者调整
-t参数。 - 本文的部分内容可能有所遗漏,如果想要更全面的理解软件运行请前往其 github 页面。
- 本文仅介绍 物种树的不一致分析 以及 基因树的不一致分析 ,其他用例请见官网。
物种树的不一致分析
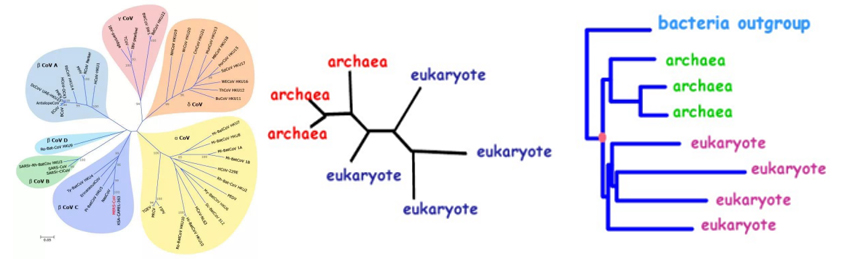
DiscoVista 的重点是关注某一特定分支在不同树中的拓扑情况,在文章中作者提到:
In many analyses, not all branches in a phylogenetic tree are equally important because questions of interest typically concern several hypotheses surrounding the relationships between focal groups. Visualizing discordance with respect to only these focal relationships simplifies interpretation.
因此这一部分的重点和难点就在于支定义文件的编写,需要有一定先验认识。
此次示例中进行了以下划分:
- 将
人黑猩猩划分成一个组(灵长类)。 - 将灵长类组与
小鼠共同划分成一个组(哺乳类)。 - 将哺乳类组与
鸡共同划分成一个组(陆生动物类)。
支定义文件生成步骤:
1 | 也可使用后记中的脚本进行替代,不过相应地需要使用 Juse 的 fork 版本 |
1 | # anno-1.txt内容 |
此后对 anno.txt 中的 Terrestrial Mammal 组进行补充,得到最终的支定义文件。
由于 IQTREE 和 Astral 得到的物种树结果一致,均为以下拓扑结构且支持率都达到最大:
1 | (Pan_troglodytes,((Gallus_gallus,(Xenopus_laevis,Danio_rerio)100)100,Mus_musculus)100,Homo_sapiens); |
因此为了展现出不同的情况,我将黑猩猩与小鼠的位置互换并得到以下拓扑结构:
1 | (Mus_musculus,((Gallus_gallus,(Xenopus_laevis,Danio_rerio)100)100,Pan_troglodytes)100,Homo_sapiens); |
每一个物种树文件都应该单独放置在一个文件夹内,并以 estimated_species_tree.tree 命名,文件夹名称命名格式为 模型-序列类型,例如:
1 | - tree |
运行:
1 | $WS_HOME/DiscoVista/src/utils/discoVista.py -m 0 -c anno.txt -p tree -t 95 -m 0 -o results |
-m 指定进行哪种分析,-c 指定支定义文件,-p 指定物种树存放文件夹,-t 为高度支持分支的支持率阈值,-o 为结果输出位置。
在该例中,results 文件夹里的 pep.block.pdf 等即为 DiscoVista 运行结果:

可以看到结果是符合预期的,即所有的树都支持之前划分的不同分支(除了人为编写的物种树)。
基因树的不一致分析
和上述分析类似,不过本例中每一个基因树文件都应放置在单个文件夹中的单个文件夹内(相当于 /不同基因/不同建树方法)并以 estimated_gene_trees.tree 命名。本文示例中每个基因只采取了一个建树方法进行,因此可以运行以下命令:
1 | i=1 |
将 genetree/ 换成自己的基因树存放文件夹,此后运行 DiscoVista:
1 | $WS_HOME/DiscoVista/src/utils/discoVista.py -c anno.txt -p genetree -t 75 -m 1 -o genetree_results |
运行后,文件夹 genetree_results 中的 Monophyletic_Bargraphs.pdf 等文件即为结果:
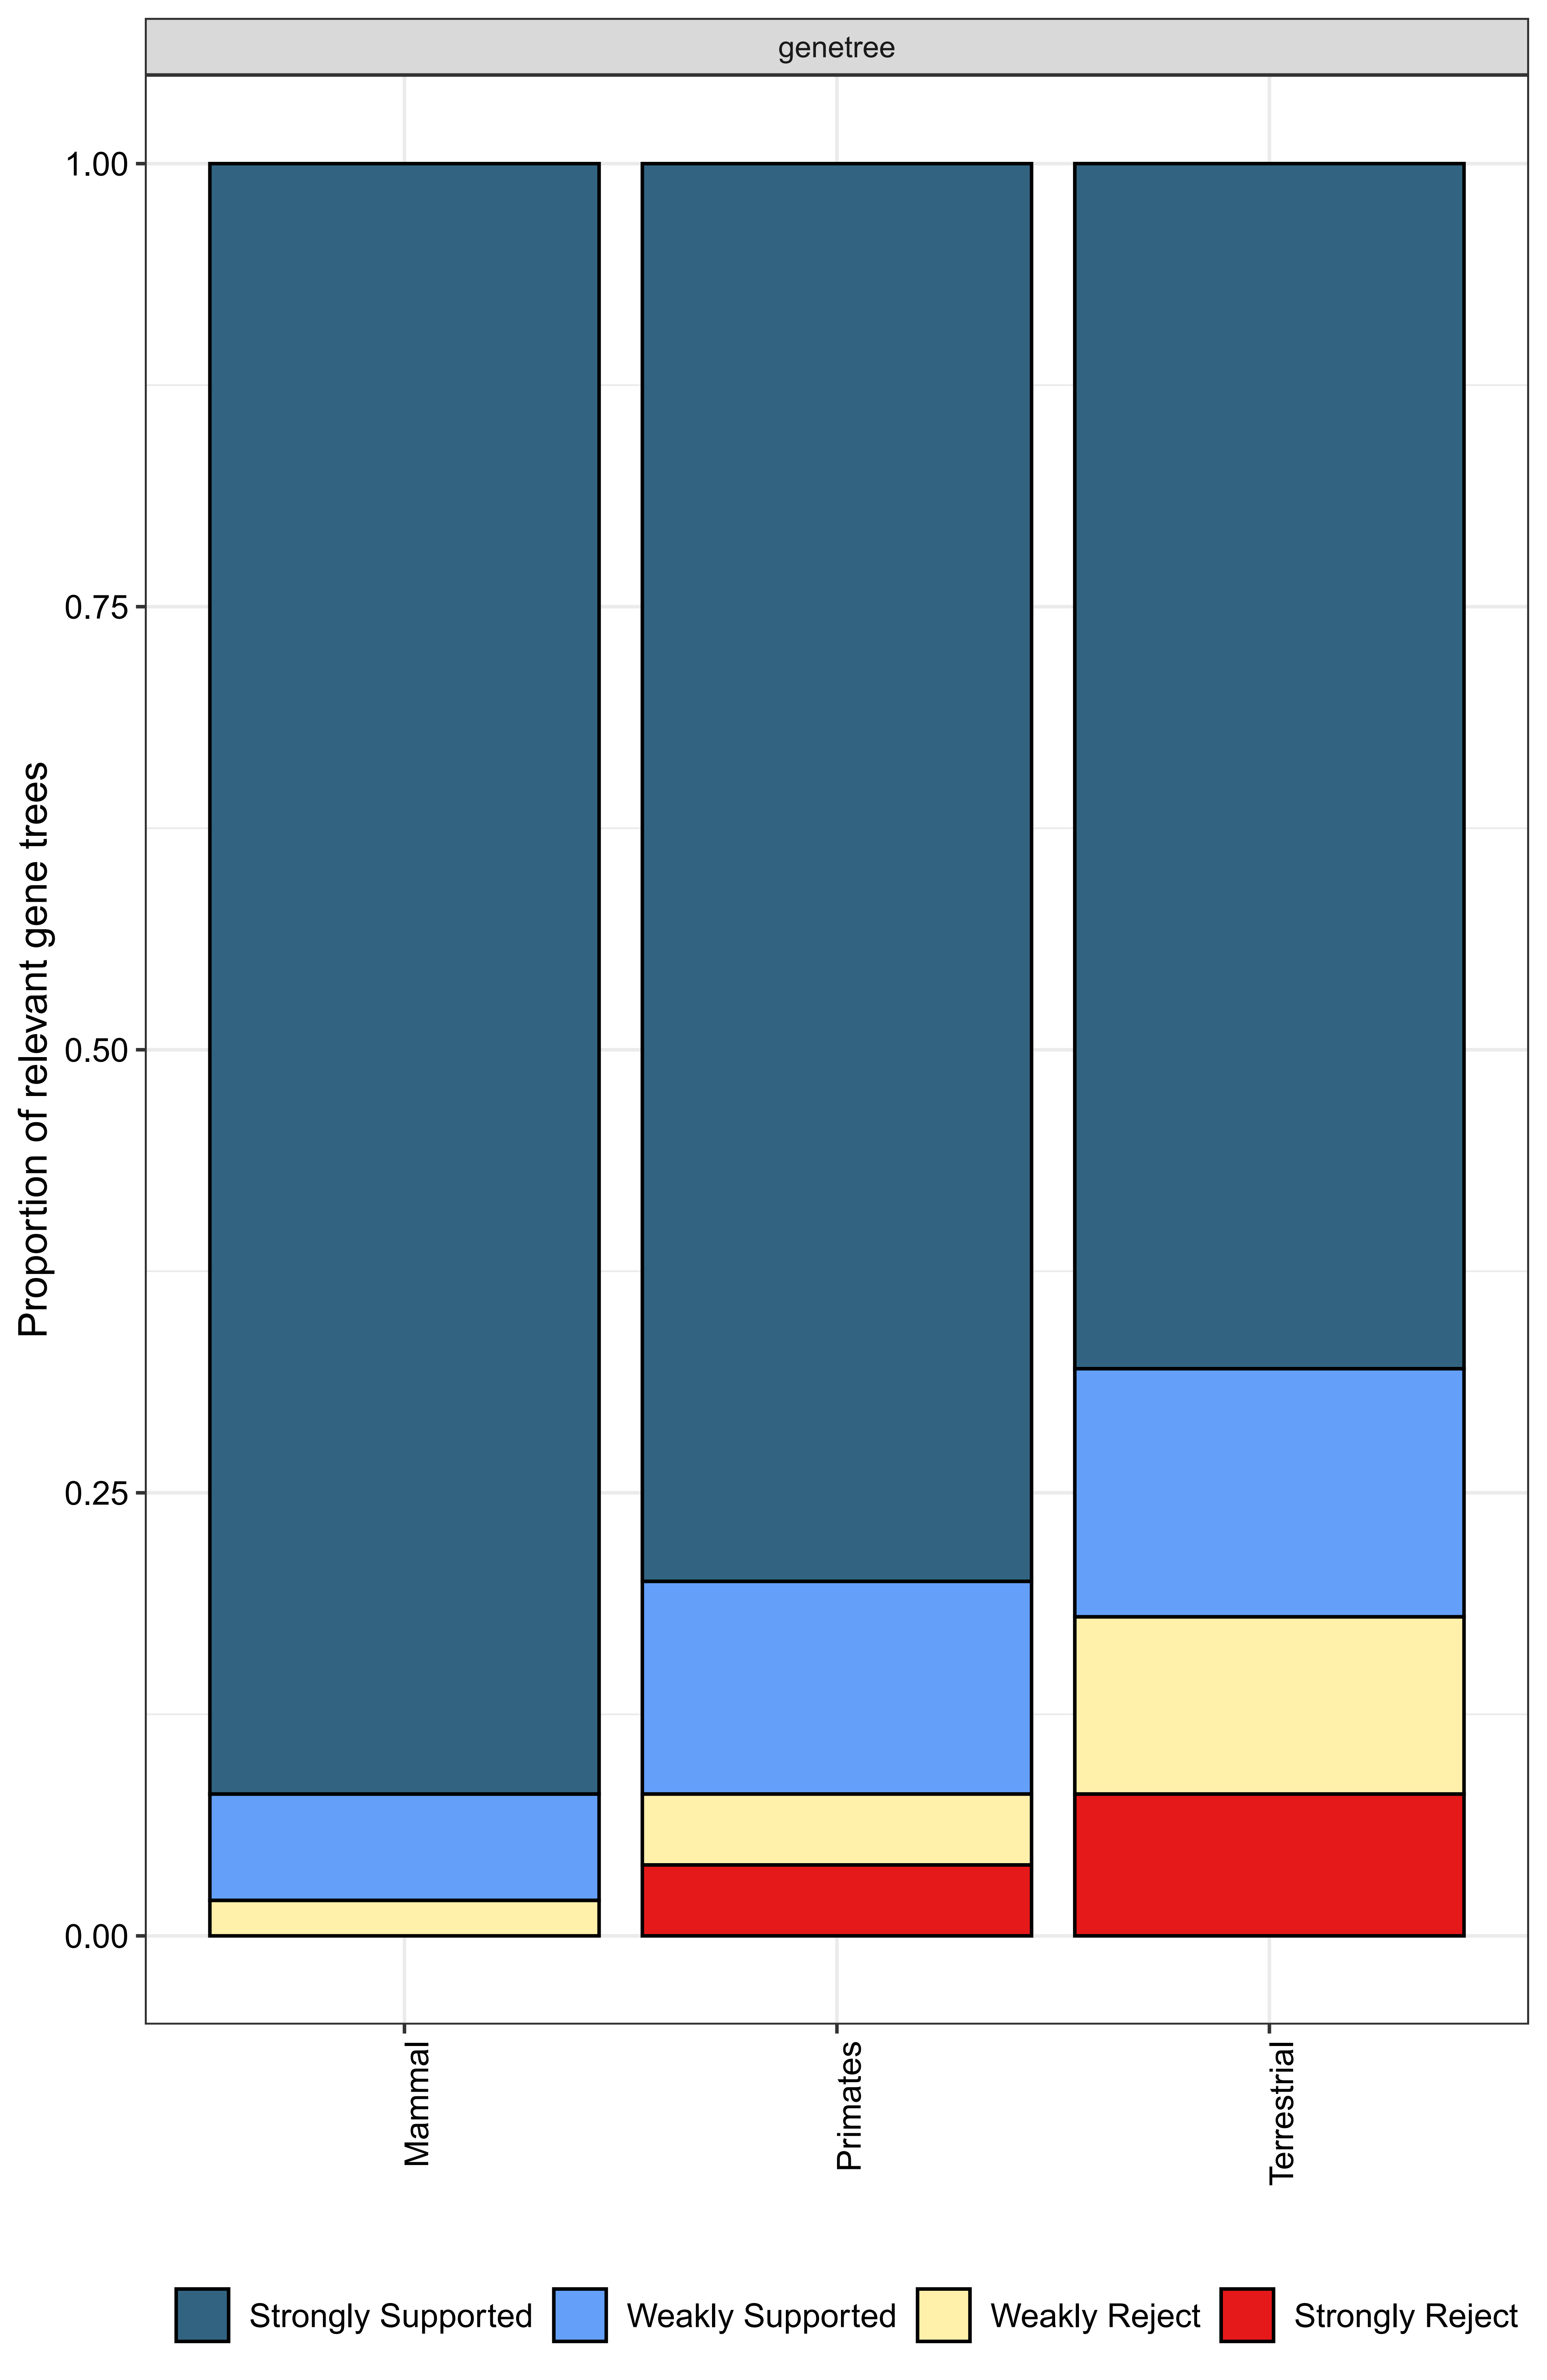
其中有部分基因并不支持我们所定义的支(例如哺乳类和陆生类有部分基因显示强拒绝),但大多数还是符合先验预期的。
涉及到的其他脚本
上述部分以一个简单的示例说明了 DiscoVista 如何使用,该部分将展示本文中使用的相关脚本。
自己编辑的支定义文件生成脚本:
1 | # generate_clade-defs.py |
1 | python generate_clade-defs.py anno-1.txt anno.txt |
注意以下几点可能需要留意和自己修改:
- 该脚本生成的支定义文件仅与 Juse 本人 fork 后编辑的 DiscoVista 兼容(见正文开头)。
- 该脚本自动将包含多个物种的类群编辑为显示(即第四列为 1)。
- 不支持复合类群的定义,请在生成支定义文件后自行添加。
将 RefSeq 格式的序列文件转变成以物种名为开头的序列格式:
1 | # ref2spename.py |
该脚本需要下载 Bio 包,运行例:
1 | python ref2spename.py ncbi_dataset/data/GCF_000001405.40/protein.faa human.fasta |
运行前(protein.faa)序列名格式 & 运行后(human.fasta):
1 | >NP_000005.3 alpha-2-macroglobulin isoform a precursor [Homo sapiens] |
该脚本已上传至 github 中,可见:https://github.com/JuseTiZ/PyScript-for-CT
将树文件中支持率变为 100 倍(注意该脚本直接覆盖原文件):
1 | # pp2perc.py |
运行例:
1 | python pp2perc.py astral.treefile |